


 2024")


")


: Finding Slots with Favorable Payouts")


Transfer Photos from iPhone to Computer: Hello Guys, In Modern age we the humans never miss out some memorable moment of our lives by capturing in our phones. Maybe last night party, go to with your friends on a Long weekend. We never stop taking pictures. Even, sometimes we don’t need an occasion to capture moments or our loved ones. We also end up saving photographs from WhatsApp, Instagram, telegram, screenshots, and images from emails and the apps Safari. All of these, eat up a significant chunk of space in our iPhone, leaving less and less space for newer memories. The solution is not to stop clicking pictures from your iPhone, but to get the smart trick to store those pictures and make space for new moments and memories. So, Today in this post How to Transfer Photos from iPhone to Computer or Laptop.
As we all know, iPhone has an excellent camera with its high picture quality and multitudes of the feature. All the versions of iPhone, may it be the built-in iSight camera or iPhone 8’s 12 MP camera, are all built to make people fall in love with the photograph. Other Models of iPhone 8 Plus and iPhone X’s has also outstanding capacity capture high-quality pictures of your loved ones.
How to Transfer Photos from iPhone to Computer

But When it comes to How to Transfer Photos from iPhone to Computer you have to remember that there are multiple ways and methods you can pick to do so. There are lots of tutorials to tell you how you can transfer the file from iPhone to computer or laptop. But the smart decision of selecting the natural and best method, as it depends upon your support and comfort. Also, you can see our previous article about free download GBWhatsApp APK, which you can use on your phone. Here in this article, I mention the three easy and efficient tricks to transfer files from iPhone to the computer easily.
Method 1 – Transferring all the media files from iPhone to your Computer (Windows 7, 8, 10)
The first trick will allow you to transfer all the media files from iPhone to your windows 7 windows 8, or Windows 10 computer using other software. This trick is the free and easy way for you make space in your iPhone, by following some steps.
Step 1: First of all download ‘Free download AnyTrans for iOS’ software on your windows.
Step 2: After download, install it correctly. After that Connect your iPhone to the network with a USB.
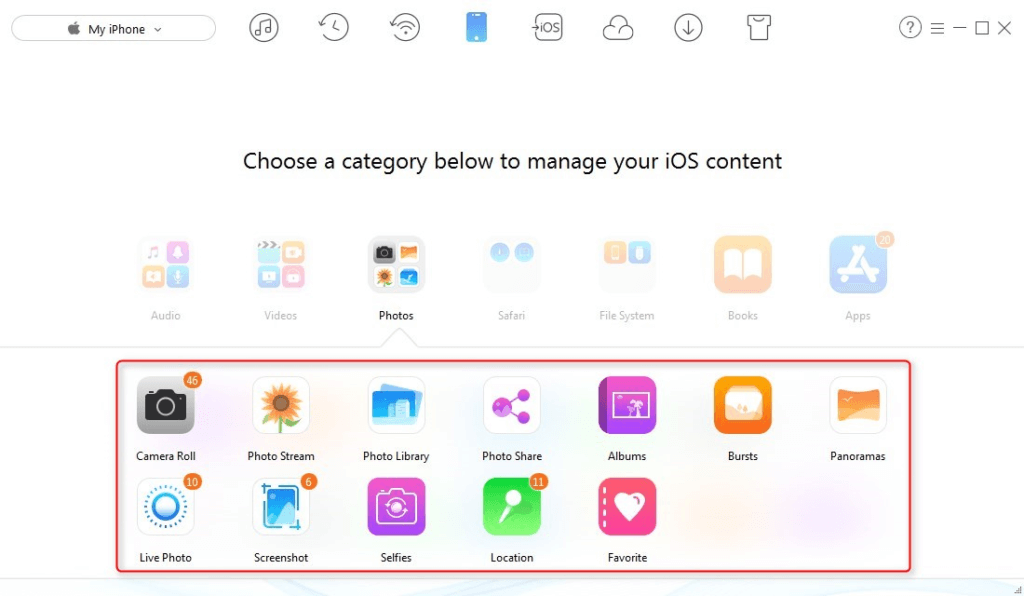
Step 3: Launch the application on your computer, the application starts working, click on the tab ‘Devices’ and then click on ‘Content to Computer’, which is a button you will find on the Homepage of the application.
Step 4: Choose the categories of photos you wish to transfer to your computer.
Step 5: Once you know which file you want to transfer the date from, click on the select button and then the right arrow button. After this, the transfer of the data from the folder you have selected to your computer would start. That’s it.
Method 2 – Transferring Selected Files or Photos from iPhone to the Mac Computer
If you want to transfer not the whole file but a few photos from your iPhone to your computer, follow the below steps.
Step 1: Download, install and run ‘’ on your MAC.
Step 2: Connect your phone to your MAC using a USB cord. Click on the tab ‘Device’ and then click on the six dots white button at the right side of the Homepage.
Step 3: Click on Photos. and select one or multiple images you wish to transfer from your iPhone to your Computer MAC.
Step 4: Next, click on the ‘To Computer’ button and transfer the selected files from your iPhone to the computer.
Step 5: Now, check whether you have received all the photos wanted from your iPhone to your computer.

Method 3 – Transferring photos from iPhone to Windows 7 using the AutoPlay
Step 1: Connect your iPhone to your Windows 7 computer. When the AutoPlay window pops up you need to click on the “Import Pictures and Videos using Windows”.
Step 3: The next step is to click on import settings link. Next, click the browse button next to the ‘import to’ field to select the folder to which you want to transfer the files.
Step 4: Once you are done setting up the import options, select OK. You can choose a tag and click on the Import button.
Also Check: Instagram Video Downloader App Iphone
Final Words
So, guys, these were top ways which you can use for transfer iPhone photos to your mac without any issues. So let’s try out these methods, if you have any problems while following these, let us know by comments below. Stay tuned at Techtalkies365.Com for more cool tips & tricks like these.


